
Connect Stripe
Sweescape collects your sales with Stripe, an online payment service. You connect your own Stripe account: every payment is created directly on that account, never on a Sweescape account.
What this means
Section titled “What this means”- You receive the money directly. The buyer’s payment goes to your Stripe account. Stripe then pays it out to your bank account, according to your Stripe account settings.
- Sweescape takes no commission. Sweescape deducts nothing from your sales. Only Stripe’s fees apply, according to your Stripe agreement.
- Refunds are made in Stripe. Sweescape does not refund buyers itself. See Sales, orders and refunds.
- Sales are in euros.
Where to find the Stripe connection
Section titled “Where to find the Stripe connection”Open your account menu, top right, then Settings. In the External connection card, the Stripe row is marked Necessary: without it, you cannot create an event with ticketing.
As long as no account is connected, the row shows Learn more and Connect. After that, it shows View accounts and Add.
Connect an account
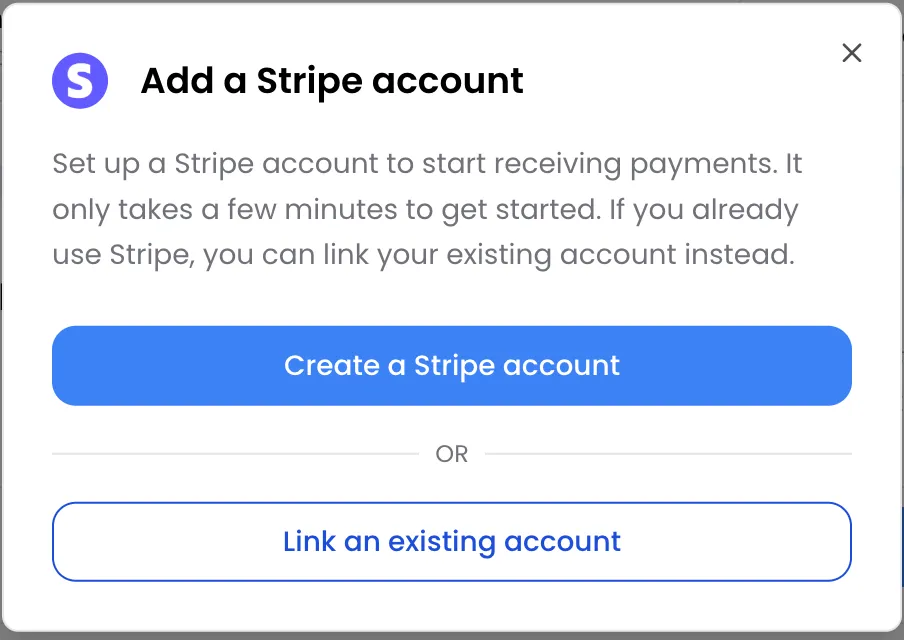
Section titled “Connect an account”Click Connect (or Add if you already have an account). The Add a Stripe account window gives you two options.
You don’t have a Stripe account
Section titled “You don’t have a Stripe account”-
Click Create a Stripe account.
-
The Stripe Connection window opens with Stripe’s form. Follow its steps: Stripe asks for information about your business and the bank account that will receive your payouts.
-
At the end, the message Thank you for linking your Stripe account to Sweescape. appears. Close the window: the account shows up in the list.
You can stop the form and resume it later with the Complete your account button.
You already have a Stripe account
Section titled “You already have a Stripe account”-
Click Link an existing account. You are redirected to Stripe.
-
Log in to Stripe, choose the account to link and authorize the connection.
-
Stripe sends you back to Sweescape. The message Account connected successfully! appears and you are back in Settings.
Complete your billing details
Section titled “Complete your billing details”This step is required to create an event with ticketing. After each payment, Sweescape automatically sends an invoice to the buyer: these details are those of the company selling the tickets.
-
In the Stripe row, click View accounts to expand the list.
-
Wait until your account shows Account activated with a green check mark. This status appears once Stripe has approved your account and allows payments and payouts.
-
Click Complete your invoice informations.
-
Fill in the Invoice Company Information window:
- Company name: the legal name shown on invoices.
- Full Address: street number and name, city, zip code and region.
- Country: France, United Kingdom or Spain.
- SIREN: your company’s French identification number.
- VAT ID: your intra-community VAT number, for example
FR12345678901.
-
Click Validate and Connect to Stripe. The message Invoices shelf company created successfully! appears and the button disappears.
All fields are required and must contain at least 2 characters.
Check that everything is ready
Section titled “Check that everything is ready”Your account is ready when it shows Account activated and the Complete your invoice informations button is gone.
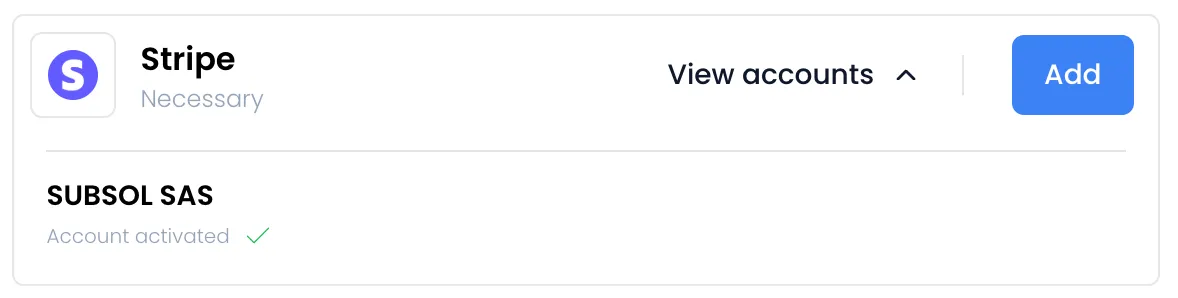
You can then create an event with ticketing and choose this account in the Stripe account field. See Create an event.
If no account is ready, creating an event with ticketing shows the Stripe Configuration Required window, with a Configure Stripe button that takes you back to Settings.
Several Stripe accounts
Section titled “Several Stripe accounts”Each brand you manage can collect payments on its own Stripe account, with its own legal entity. The number of accounts depends on your plan:
| Plan | Stripe accounts |
|---|---|
| Free Plan | None |
| Advanced Plan | 1 |
| Agency Plan | 5 |
To add one, click Add in the Stripe row. Accounts still being set up count toward the limit.
Each event is tied to the Stripe account chosen when it was created. When you reach the limit, the One Stripe account per brand window offers to move up to the next plan. Beyond the Agency Plan, it shows Contact us. See Plans and subscription.
Remove a Stripe account
Section titled “Remove a Stripe account”The trash icon only appears on an account whose setup is not finished. Click it, then confirm: the message This action will permanently delete this stripe account. Are you sure you want to continue? appears before deletion.
If Stripe refuses the deletion, the message You are not authorized to delete this stripe account! appears. An activated account cannot be removed from Sweescape.
If the connection fails
Section titled “If the connection fails”| What you see | What to do |
|---|---|
| The code is invalid, please retry! | You canceled on Stripe or the connection expired. Start again from Connect. |
| The account is already connected. | This Stripe account is already in your list: click View accounts. |
| The One Stripe account per brand window | Your plan does not allow another account. Subscribe or move up to the next plan. |
| An error occurred, please retry later or contact support! | Stripe could not create the account. Try again a little later. |
| The account never shows Account activated | Stripe still needs information: click Complete your account and finish the form. |
| The stripe account is inactive, please retry with a valid stripe account! when creating an event | The selected account has not been activated by Stripe yet. Finish its setup. |
| The invoice company does not exist, complete your company information on settings stripe! | Fill in this account’s billing details (see above). |
If the problem persists, write to [email protected].