
Audience contacts and segments
Each audience has its own page, with three tabs: Contacts to manage the list, Segments to target part of the list, Settings for its name and its email and phone columns.
Open an audience page
Section titled “Open an audience page”Open your account menu at the top right, then Audience, and click the audience card. The header shows its type (Manual Import or Past Event), its number of contacts and its creation date. The arrow to the left of the name takes you back to the list of audiences.
If the email column or the phone column is not chosen yet, a blue banner invites you to do it in the settings (see Choose the email and phone columns).
View the contacts
Section titled “View the contacts”The Contacts tab shows a table: one column per piece of information from your file, then a status column and an actions column.
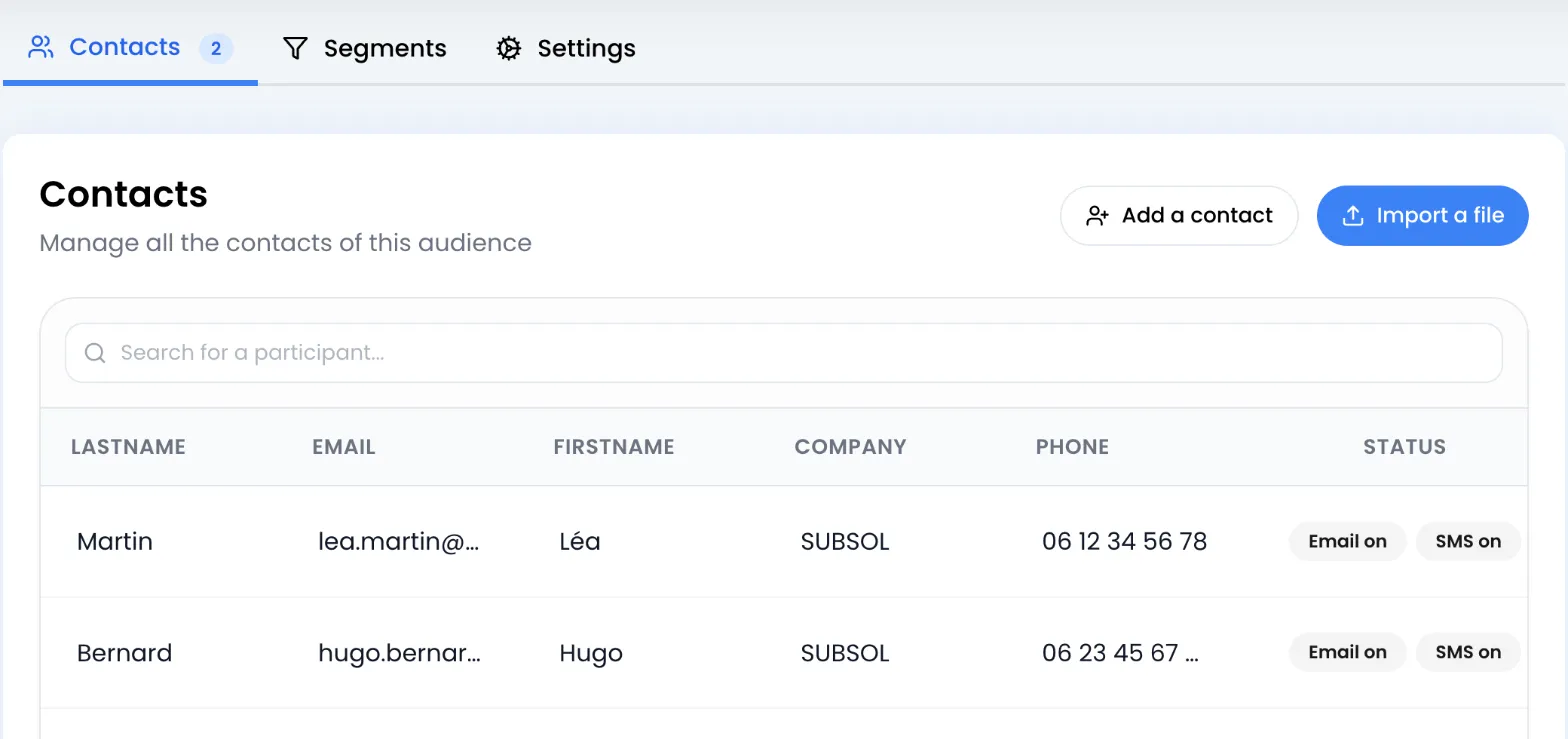
- The status column shows two badges per contact: Email on or Email off, SMS on or SMS off. A red badge means this contact will no longer receive your campaigns on that channel (see Deliverability and unsubscribes).
- The Search for a participant… field filters the rows: it searches all columns at once.
- Dates are displayed in your language’s format and true/false values as Yes / No.
- The table shows the first 1,000 contacts. The counter on the tab always shows the total number.
Add a contact
Section titled “Add a contact”-
In the Contacts tab, click Add a contact.
-
The window shows one field per column of the audience. Fill in the ones you know, for example the email
[email protected], the first name and the city. -
Click Add contact. The message Contact added! appears.
If the email address is already in the audience, the contact is not created and the message This contact is already in the audience. appears. The address is not checked as you type: read it again before confirming.
Import a file into an audience
Section titled “Import a file into an audience”Importing adds the contacts of a file to an existing audience, without touching the ones already there.
-
In the Contacts tab, click Import a file. From the list of audiences, the ⋯ menu of a card offers the same action.
-
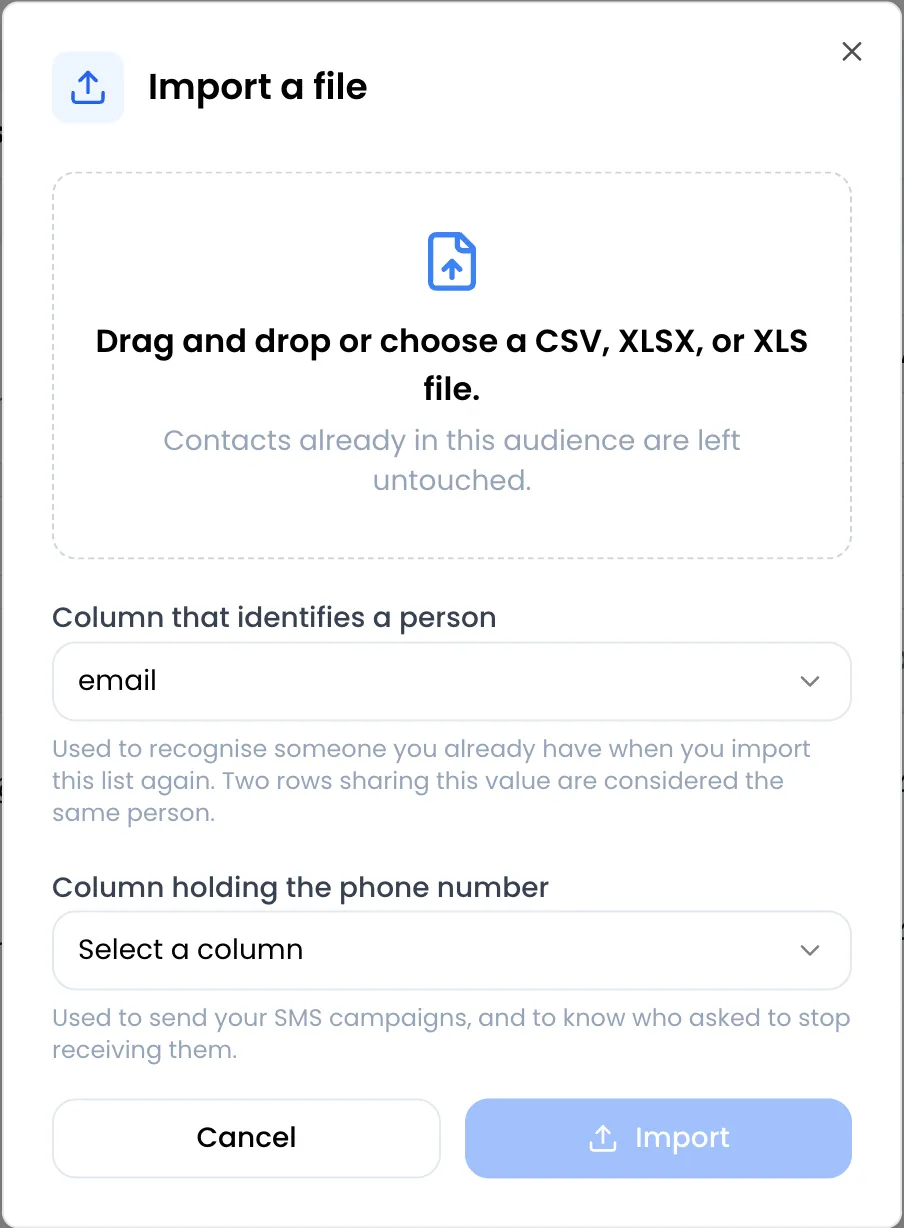
Drop a CSV, XLSX or XLS file (10 MB maximum) into the area, or click it to pick the file. The file name is displayed. Drop another one to replace it.
-
Check the Column that identifies a person. The list offers the columns already in the audience. The chosen column must exist in the file, otherwise the message This column is not in your file! appears.
-
Click Import.
The result appears at the top of the screen: 12 contacts imported!, or 12 contacts imported, 3 already known and left untouched. when some addresses were already in the audience.
What you need to know about importing:
- A contact you already have is not updated. If a row’s email address already exists in the audience, the row is skipped, even if its other information has changed. To correct a contact, edit it by hand.
- New columns are added to the audience. If the file has a column the audience does not have, it is created; it stays empty for existing contacts. Keep the same column names from one file to the next to keep a clean table.
- The window also shows the Column holding the phone number, but this choice is only saved from the Settings tab.
- The error messages are the same as when creating an audience: file too large, invalid extension, or Invalid data, please retry with a valid file! for a file without any contact row.
Edit or delete a contact
Section titled “Edit or delete a contact”Click the gear icon at the end of the row. The Contact Settings menu offers:
- Edit the contact: opens the Update participant window, with one field per piece of information of the contact. Empty a field to erase the value, then click Update.
- Delete the contact: after confirmation, the row is deleted from this audience only.
- Stop sending emails and Stop sending SMS: see the next section.
Unsubscribe a contact manually
Section titled “Unsubscribe a contact manually”When someone asks you, by phone or by message, to stop receiving your campaigns, unsubscribe them yourself:
-
Click the gear icon on their row.
-
Choose Stop sending emails, Stop sending SMS, or both one after the other.
-
The badge switches to Email off or SMS off.
This unsubscribe applies to your whole account: the address or number is added to your suppression list, with the reason Added by hand. The person no longer receives any campaign on that channel, whatever audience they are in. Your events’ invitations and automations still reach them.
To undo, choose Send emails again or Send SMS again in the same menu.
These actions rely on the columns declared in the Settings tab: without an email column, Stop sending emails has no effect; without a phone column, neither does Stop sending SMS. Deleting a contact, on the other hand, does not erase their unsubscribe: if they come back in a later import, they stay unsubscribed.
Create a segment
Section titled “Create a segment”A segment is a filter saved on an audience, for example “contacts in Paris” or “people who have a phone number”. It is re-evaluated at every send: a contact imported tomorrow who meets the conditions joins it automatically. You then pick it as the recipients of a campaign, instead of the whole audience.
-
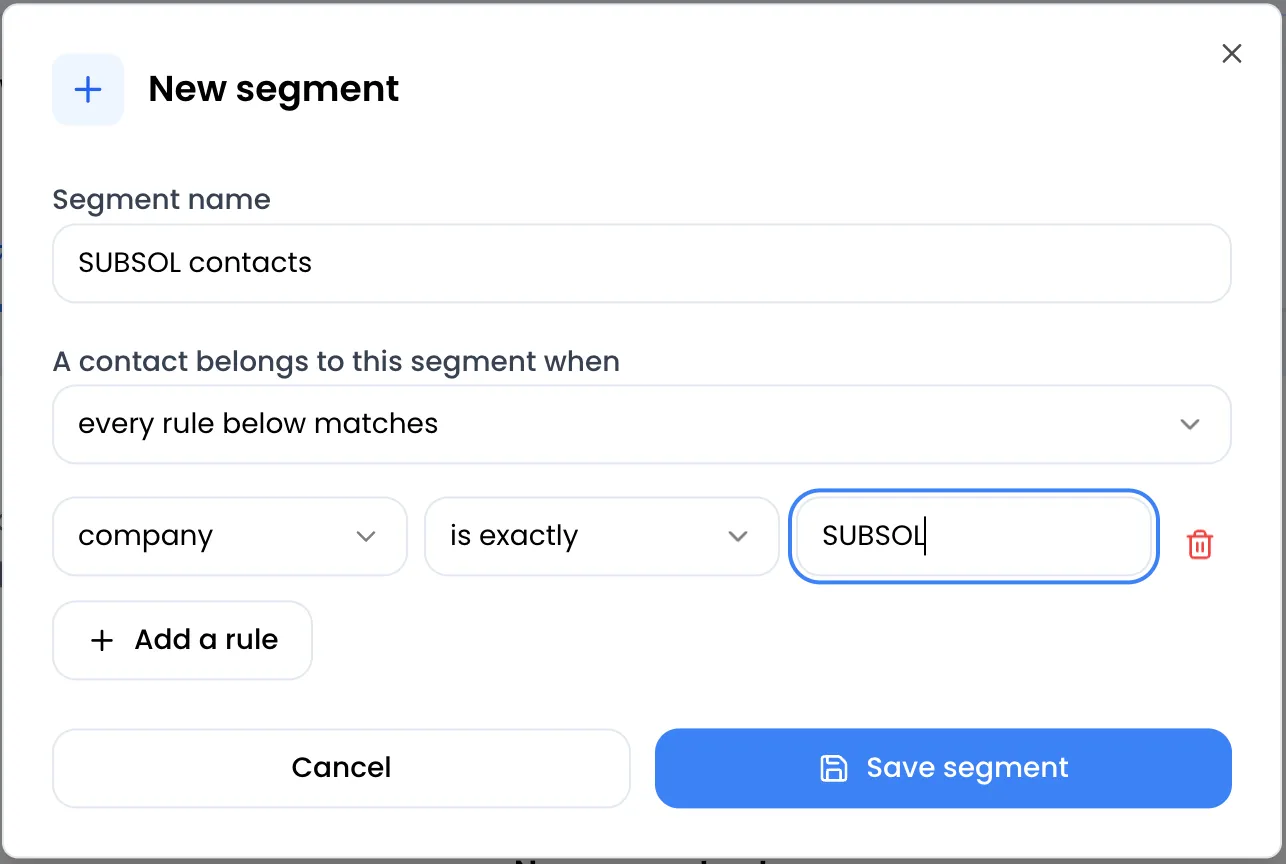
Open the audience’s Segments tab and click New segment.
-
Enter the Segment name, for example “Parisians”.
-
In A contact belongs to this segment when, choose every rule below matches or at least one rule matches.
-
For each rule, choose a column, a condition, then type the value. Click Add a rule to add another one, or the bin to remove one.
-
Click Save segment. The message Segment saved! appears.
An incomplete rule (no column, or no value when the condition needs one) is ignored when saving. If no complete rule is left, the message Every rule needs a column and a condition. appears. A segment without a name shows Give your segment a name.
Available conditions
Section titled “Available conditions”| Condition | Meaning |
|---|---|
| is exactly | The value equals the text you typed. Upper case and spaces at the start or end do not count: “paris” finds “Paris”. |
| is not | The value differs from the text you typed. An empty cell counts as different. |
| contains | The value contains the text you typed, ignoring upper case. |
| does not contain | The value does not contain the text you typed. An empty cell meets this condition. |
| starts with | The value starts with the text you typed, ignoring upper case. Handy for a postcode: “75”. |
| is empty | The cell is empty. No value to type. |
| is filled in | The cell contains something. No value to type. |
| is greater than | The value is a number greater than the number you typed. |
| is less than | The value is a number lower than the number you typed. |
Follow and edit your segments
Section titled “Follow and edit your segments”The Segments tab lists your segments. Each one shows its number of contacts, for example 128 contacts, and the chosen mode: all 3 rules match or any of 3 rules matches.
- The number of contacts counts every row that meets the conditions. At send time, unsubscribed people and duplicates are also left out: the real number of recipients can be lower.
- The pencil opens the Edit segment window.
- The bin deletes the segment after confirmation.
The Settings tab
Section titled “The Settings tab”The Settings tab lets you rename the audience, choose its email column and its phone column, and delete it. Everything is detailed in Create and manage your audiences.