
Customize the invitation email
The invitation email comes with the PDF ticket, attached automatically. You choose its sender, subject and content, which you can personalize for each attendee with variables.
Fill in the email settings
Section titled “Fill in the email settings”-
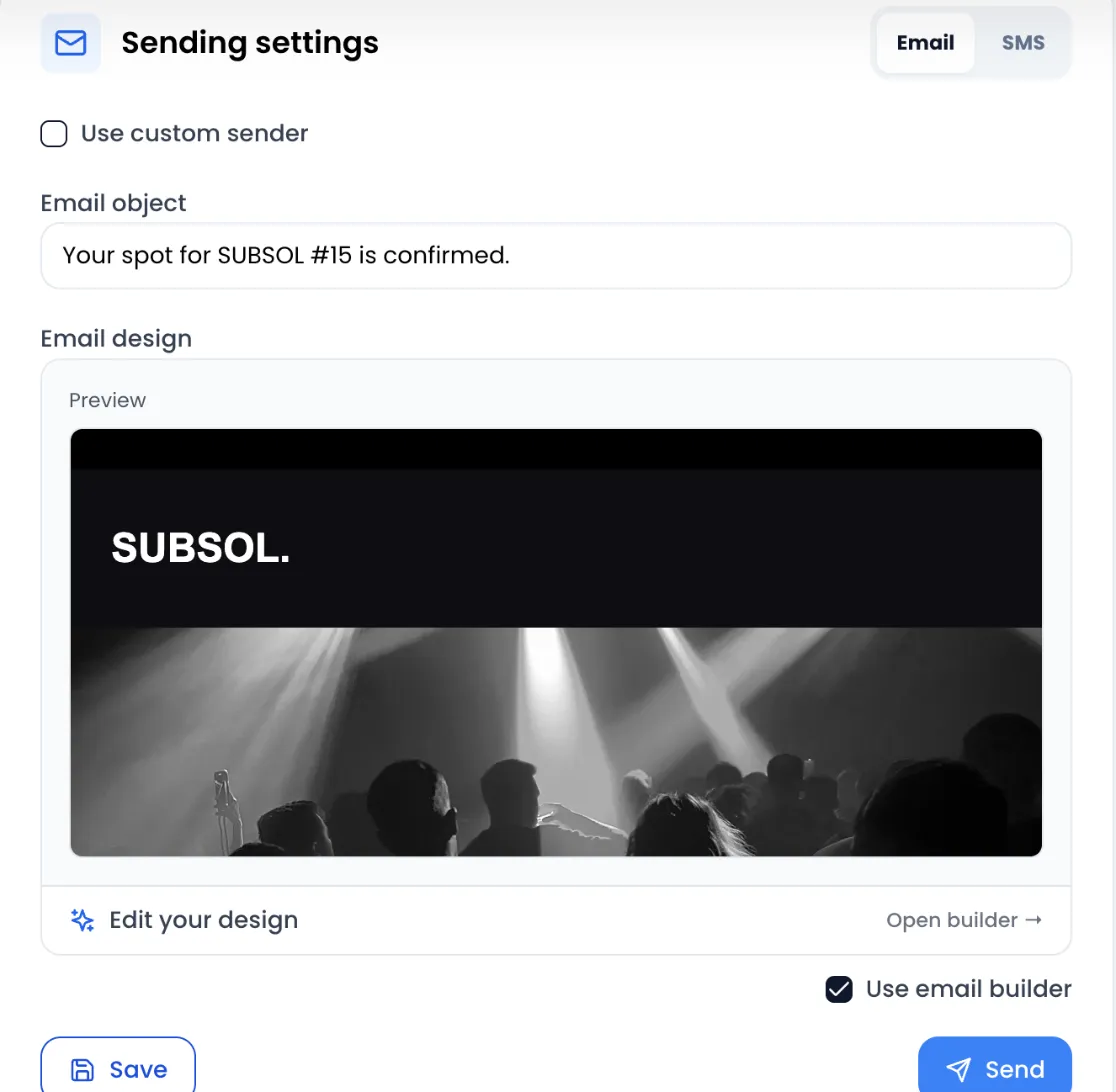
Open your event, Invitation tab. In the Sending settings card, leave the switch on Email.
-
Imported events only: in Participant email, choose the column of your file that holds the email addresses. Only a column marked (Required) is accepted, otherwise the message “Participant column must be required!” appears. For a ticketed event, this field does not exist: the email entered at purchase is used.
-
In Email object, write the subject: between 10 and 150 characters. Below 10 characters, the message “The object is not long enough” appears.
-
Write the message with the email builder (recommended, see below) or with the simple editor.
-
Click Save. The message “Invitation settings saved successfully!” confirms it, and the Send button appears next to it.
The subject also accepts variables, typed by hand: for example Your ticket for {{ eventName }}, {{ firstname }}.
Design the email with the builder
Section titled “Design the email with the builder”-
Make sure the Use email builder box is checked (this is the default).
-
Click Create your design, or Edit your design if one already exists. The Design your email builder opens full screen. The first time, it offers a starter template: a “Hello!” heading, a text and a “Discover” button. If you had written a message with the simple editor, it is carried over into a text block.
-
Build your email with blocks: headings, texts, buttons, images, columns… Each block is described in The email editor.
-
To personalize a text, place the cursor in the block and use the variables menu in its toolbar (tooltip Insert a variable).
-
Click Close builder. You are back in the settings, with a Preview of your email.
-
Click Save.
Invitation variables
Section titled “Invitation variables”Each variable is replaced, at sending time, by the details of the attendee who receives the email. In the builder and in the preview, it stays shown in double curly braces, for example {{ firstname }}.
| In the menu | Variable | Replaced by |
|---|---|---|
| Email, First name, Last name | {{ email }}, {{ firstname }}, {{ lastname }} |
The contact details entered at purchase. Offered for ticketed events. |
| The name of your fields or columns | The field name | The attendee’s answer to that custom field, or the value of the imported column. |
| Event name | {{ eventName }} |
The name of the event. |
| Ticket name | {{ ticketName }} |
The attendee’s ticket type (“Early bird”, “VIP”…). Empty for an imported event. |
| Apple Wallet link, Google Wallet link | {{ appleWalletUrl }}, {{ googleWalletUrl }} |
The links that add the ticket to the attendee’s wallet. The Add to wallet buttons block already uses them. |
If the attendee does not have the requested detail, the variable is replaced with nothing. Read your sentences again so they still make sense in that case.
Add the Apple Wallet and Google Wallet buttons
Section titled “Add the Apple Wallet and Google Wallet buttons”In the builder, the Content category offers the Add to wallet buttons block. It only exists in the invitation email. It shows the two official buttons, which open the attendee’s wallet card.
- Button language: French or English.
- Alignment and spacing work as for the other blocks.
The design of the cards themselves is set separately: see Tickets in Apple Wallet and Google Wallet.
What is added automatically
Section titled “What is added automatically”Each attendee’s PDF ticket is attached to the email, named “badge_” followed by the event name. It does not appear in the builder: there is no need to add a download button.
Write a simple message, without the builder
Section titled “Write a simple message, without the builder”Uncheck Use email builder to write a short message in the Email message field:
- the toolbar offers a heading, bold, italic, strikethrough and bullet lists;
- the Variables menu inserts the same attendee details;
- the magic wand icon opens a “Describe to SweeAgent what you want to write” field: artificial intelligence writes the message for you.
The message must be at least 20 characters long.
Choose the sender
Section titled “Choose the sender”By default, the invitation is sent from Sweescape’s sending address. To send from your own address, for example [email protected]:
-
Add and verify your sending domain: see Sending domain. As long as no domain is added, the card shows “Want to use a custom sender?” with the Add a domain in settings link.
-
Check Use custom sender.
-
Fill in Sender email, an address on your verified domain, and Sender name, the name shown in the inbox.
-
Click Save.
The custom sender is reserved for the Advanced Plan and the Agency Plan. With another plan, the fields are greyed out and an Upgrade button opens the plans.
| Message | Cause |
|---|---|
| “Domain does not exist!” | The address entered does not belong to any of your account’s domains. |
| “Domain is not verified! Please verify it before sending invitations.” | The domain is added but its verification is not complete. |
Test the email
Section titled “Test the email”There is no test send button for the invitation. To see the real email:
-
Add yourself as an attendee with your own address: see Add or import attendees.
-
In the Participants tab, click the gear icon on your row, then Send invitation by email.
-
Open the email on your phone: check the subject, the variables, the attached PDF and the wallet buttons.
Remember to delete this test attendee before the event so it does not skew your lists.