
Add or import attendees
Buyers from your ticketing page are added to the list automatically. Everyone else (guests, artists, partners, press) you add yourself from the Participants tab, with the Add a participant button. What this button offers depends on the type of event.
| Type of event | Add by hand | Import a file |
|---|---|---|
| Event with ticketing | Yes, one at a time, with a ticket | No |
| Event created by import | Yes, one at a time | Yes |
Add an attendee to an event with ticketing
Section titled “Add an attendee to an event with ticketing”You need at least one ticket in the Ticket tab. Otherwise, the window shows “Please add tickets to your event first in order to add participants.” See Create your tickets.
-
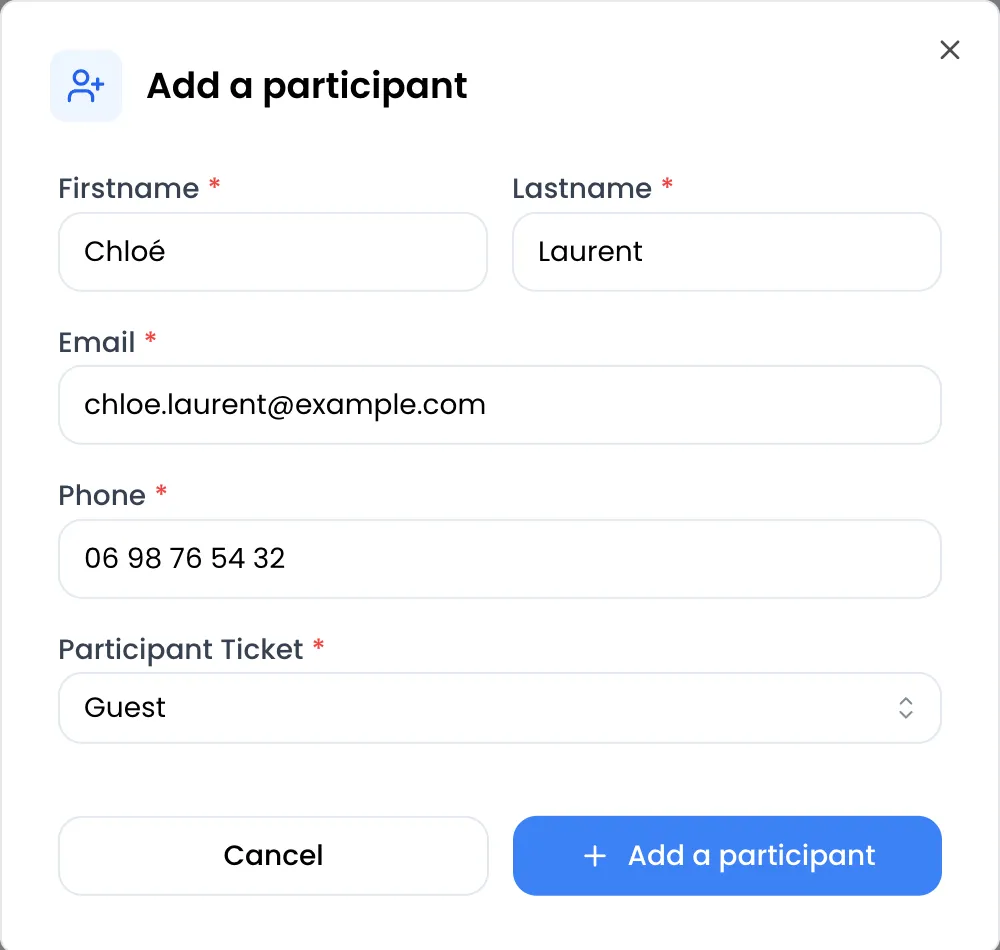
In the Participants tab, click Add a participant.
-
Fill in Firstname, Lastname and Email (a valid address).
-
Fill in your custom fields. Fields marked with an asterisk are required. Depending on their type, you enter text, a number, a date in a calendar, a Yes or No answer, or a choice from a list.
-
In Participant Ticket, choose the ticket to assign. All your tickets are listed, including those hidden behind a code.
-
Click Add a participant. The button stays greyed out while a required field or the ticket is missing.
The message “Participant created successfully!” appears and the form is cleared: you can go on with the next person. Click Cancel to close the window.
If an extension adds a field that must be unique, such as a seat number, a value that is already taken is refused with the message “An error occurred, please retry later!”.
Add an attendee to an event created by import
Section titled “Add an attendee to an event created by import”The Add a participant button opens a window in two parts: Import from CSV on the left and Add manually on the right.
To add someone by hand, fill in the Add manually form: it uses the columns of your original file, all required. Then click Add a participant.
Import a file of attendees
Section titled “Import a file of attendees”Importing is only available in an event created from a list. To create such an event, see Create an event.
-
In the Participants tab, click Add a participant.
-
In the Import from CSV part, drop your file or click the area to choose it.
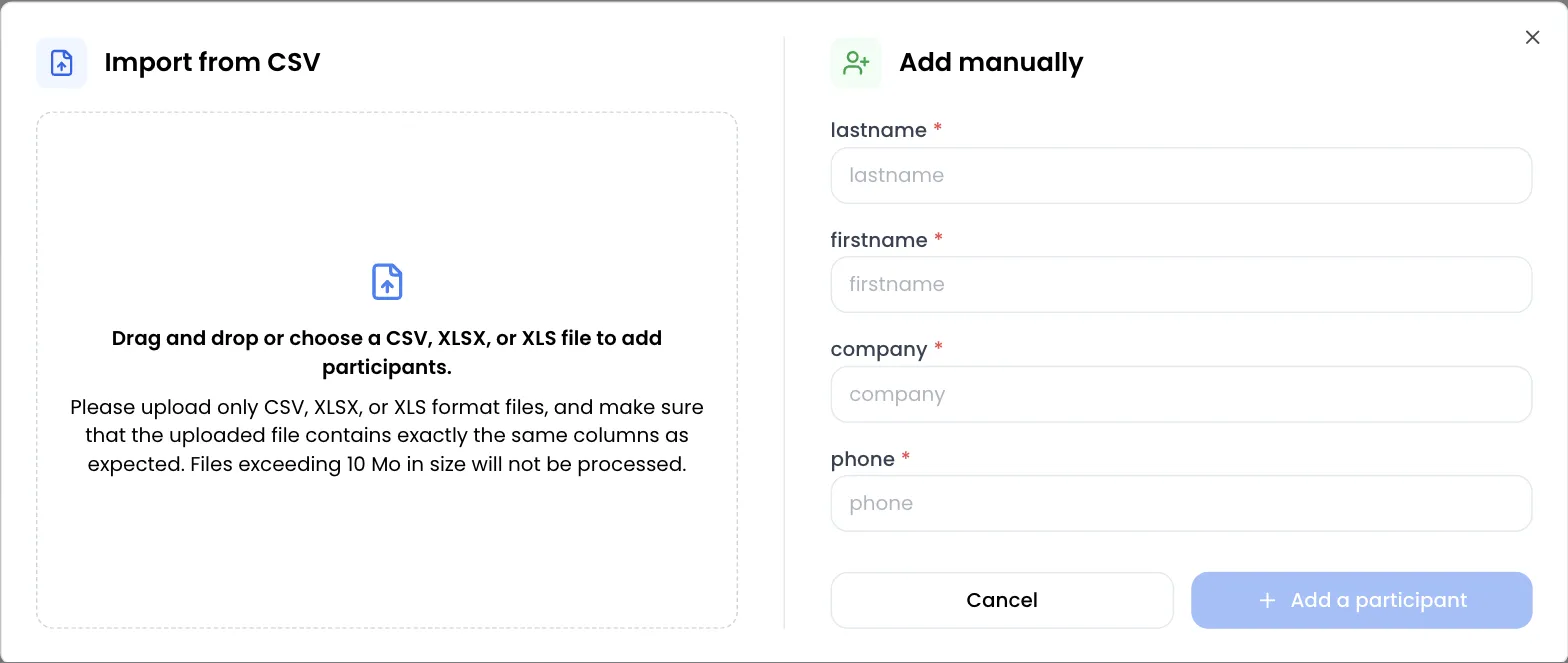
The import starts as soon as the file is dropped. The message “Participants created successfully!” appears and the table updates.
File rules
Section titled “File rules”- Formats: CSV, XLSX or XLS. For an Excel file, only the first sheet is read.
- The first row holds the column names. They must be exactly those of the event: same names, same spelling, same capitals and accents, with no extra or missing column. The order of the columns does not matter.
- Each following row becomes an attendee. All values are saved as text.
- Duplicates are not detected: importing the same file twice creates each person twice.
- For a CSV, save it as UTF-8 to keep accented characters, or drop the Excel file directly.
- The screen states that files over 10 MB are not processed.
| Message | Cause |
|---|---|
| Invalid data, please retry with same columns on file! | The file’s columns are not exactly those of the event, or the file contains no rows. |
| Invalid file extension, please retry with a csv, xlsx, or xls file! | The file is neither a CSV nor an Excel file. |
Added attendee or buyer: the differences
Section titled “Added attendee or buyer: the differences”| Buyer from the ticketing page | Added or imported attendee | |
|---|---|---|
| Order and payment | Yes, on your Stripe account | None: no order, no payment, no invoice |
| Invitation email | Sent automatically after the purchase, if set up | Not sent automatically: send it from the row menu or the Invitation tab |
| Place in the ticket stock | Counted | Not counted: adding someone does not reduce the number of places left |
| Door check | Ticket QR code scanned with SweeScan | Same: their ticket also has a QR code |
To send the invitation to the attendees you added, see Send invitations.