
Find your way around the dashboard
The Sweescape dashboard has three landmarks: your event list, your account menu at the top right, and the tabs of each event.
The header
Section titled “The header”The header stays visible on every page. On the left, the “SweeBadge” logo takes you back to the event list. On the right, your photo and first name open the account menu, and the flag changes the interface language.
The event list
Section titled “The event list”This is the page that opens after you log in. It is titled Events.
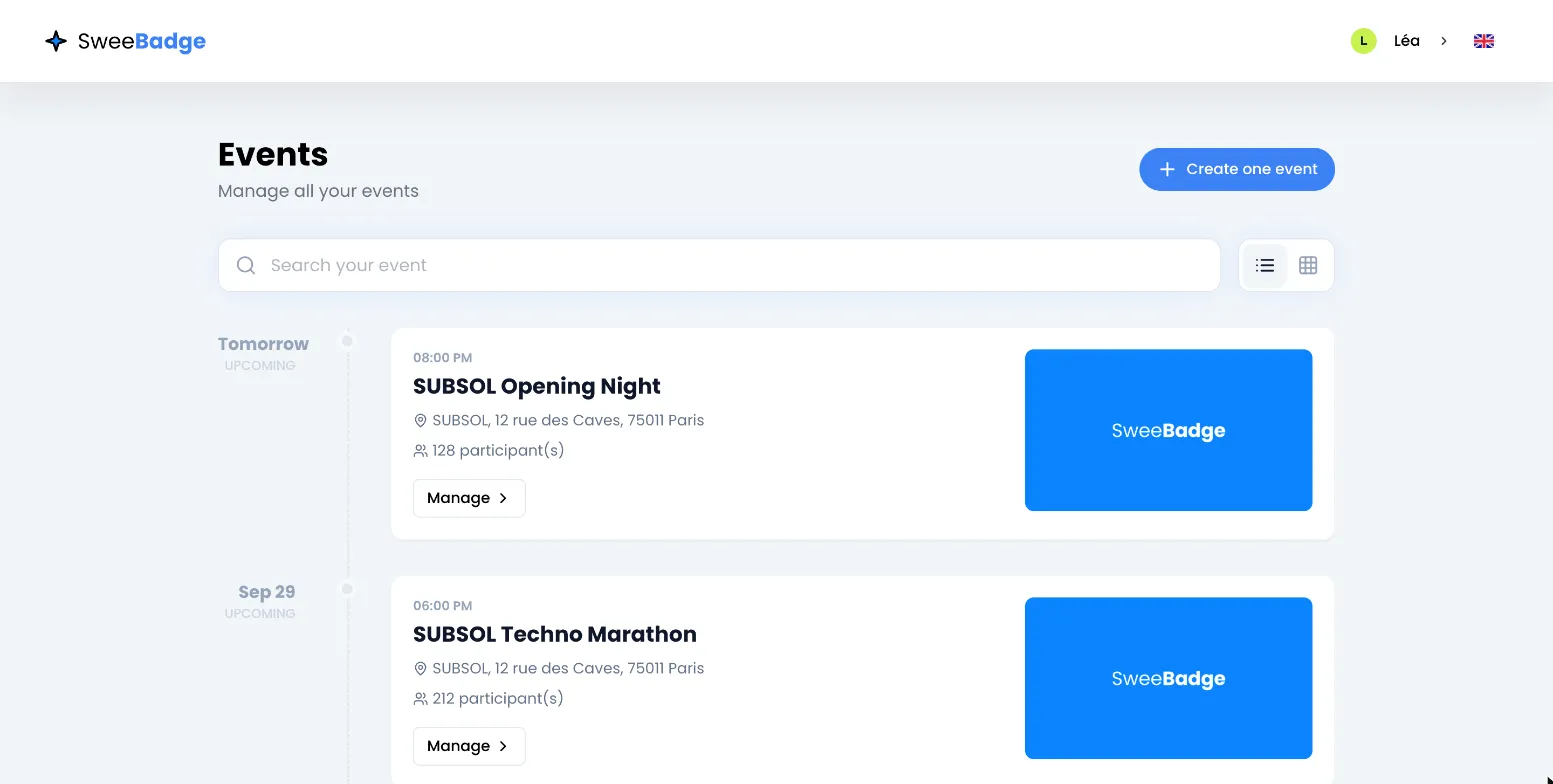
- Create one event: the button at the top right starts creating an event. See Create an event.
- Search your event: filters the list by event name.
- The two views: the buttons to the right of the search box switch between the timeline view (list icon) and the grid view. The timeline view only shows upcoming and ongoing events. The grid view shows every event, including past ones.
Events are sorted by start date, from the earliest to the latest: in the timeline view, your next event therefore comes first. Each card shows the date (Today or Tomorrow when relevant), the event status (Upcoming, Active or Past), the start time, the name, the address and the number of participants. Click the card or Manage to open the event.
See also Find your events.
The account menu
Section titled “The account menu”Click your photo and first name, at the top right, to open the menu.
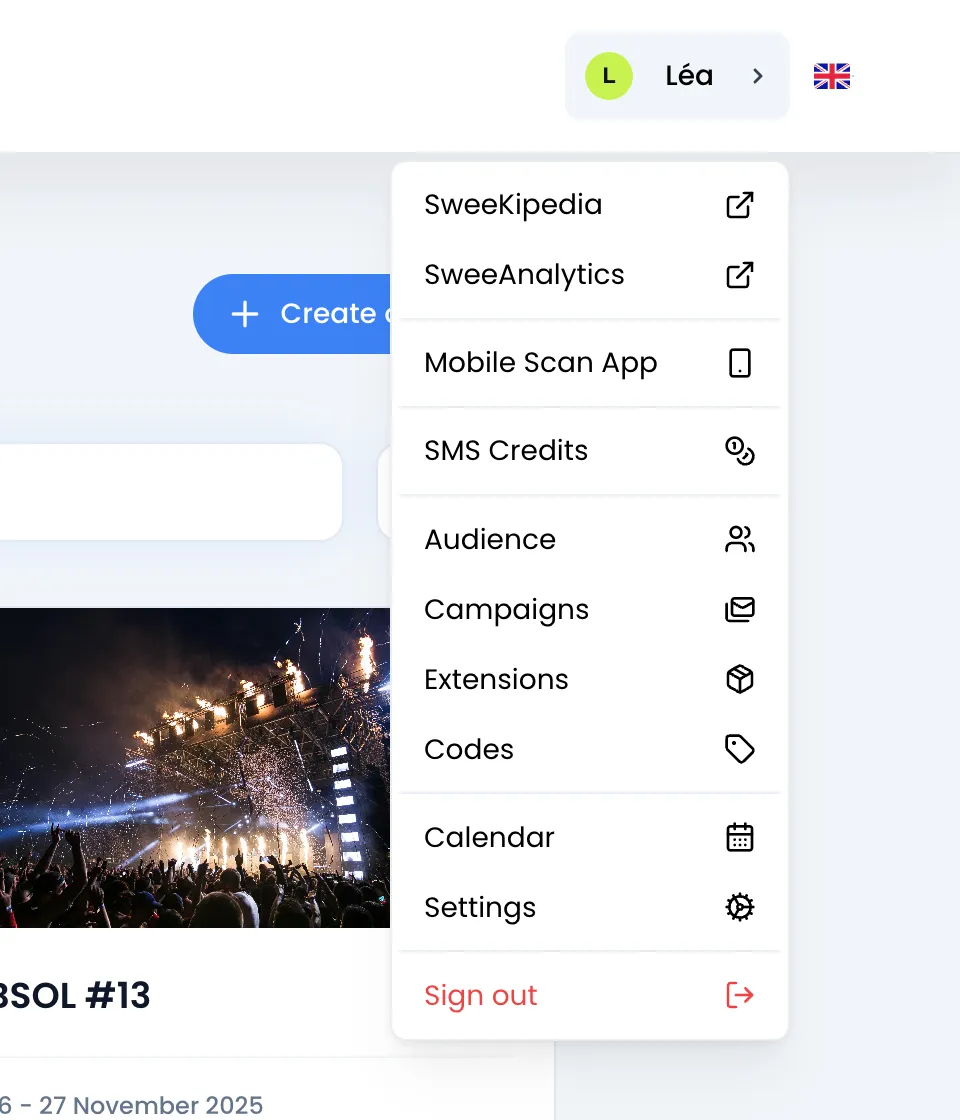
| Item | What it opens |
|---|---|
| SweeKipedia | An external help page, in a new tab. |
| SweeAnalytics | The analytics app. See Analytics. |
| Mobile Scan App | The QR codes to install SweeScan on iPhone or Android. See Install the SweeScan app. |
| SMS Credits | Your SMS credit balance and buying more credits. See Send the invitation by SMS. |
| Audience | Your contact databases. See Audiences. |
| Campaigns | Your email campaigns. See Campaigns. |
| Extensions | Your extensions and the catalog. See Extensions. |
| Codes | Codes that work on several ticketings at once. See Discount and access codes. |
| Calendar | All your events, campaigns and automations on one calendar. See See your dates in the calendar. |
| Settings | Your profile, your subscription and your connections (Stripe, Canva, sending domains). See Edit your profile. |
| Sign out | Ends your session in this browser. |
The tabs of an event
Section titled “The tabs of an event”When you open an event, its name is shown as the title and its content is split into tabs. The Participants tab opens first.
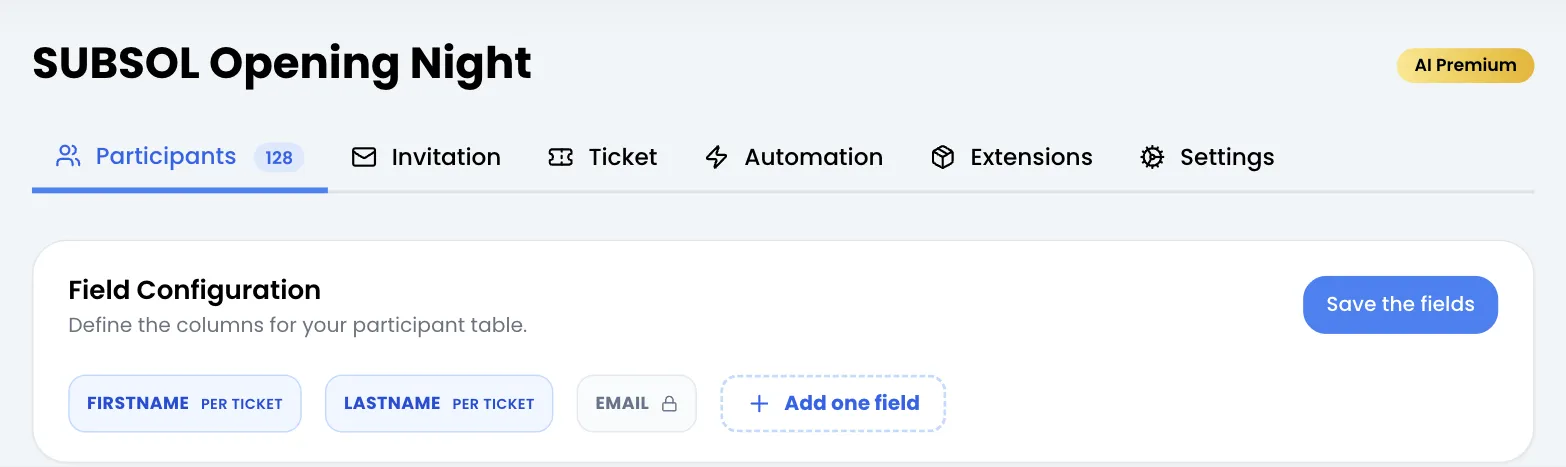
| Tab | What you find there |
|---|---|
| Participants | The attendee list, with their number in a badge, adding an attendee and check-in. See View and manage your attendees. |
| Invitation | The design of the invitation that contains the ticket, the email or SMS sending settings and the wallet cards. See Send invitations. |
| Ticket | The ticketing page, your tickets, your own domain and the event’s codes. See Create and manage tickets. |
| Automation | Messages sent automatically to attendees on a given date. See Automations. |
| Extensions | Turning on, for this event, the extensions of your account. See Install an extension. |
| Settings | The event information, collaborators, duplication and deletion. See Edit an event’s information. |
In the Settings tab, the Transform into audience card only appears once the event is over. See Audiences.
Change the language
Section titled “Change the language”Click the flag to the right of your first name and choose France, the United Kingdom or Spain. The interface switches right away to French, English or Spanish. This choice is saved in your browser, not in your account.
See also Create your account.