
Schedule automatic messages
An automation sends an email or an SMS to an event’s attendees, once, on the date and at the time you choose. You prepare it in advance and it goes out without you: a reminder the day before, access information on the day, a thank-you or a satisfaction questionnaire the day after.
Every attendee concerned receives it at the same time, at the planned time. It is not triggered by each purchase.
Automations are part of the paid plans, with no limit on the number per event. Without an active subscription, creating one opens a window inviting you to pick a plan (see Subscription).
The Automation tab
Section titled “The Automation tab”Open your event, then the Automation tab.
As long as the event has no automation, the tab shows No active workflows and three shortcuts:
- D-1 Reminder: pre-fills the name “Reminder” and a date the day before the event starts, at the same time.
- D+1 Feedback: pre-fills the name “Feedback” and a date the day after the event ends, at the same time.
- New workflow: an empty automation.
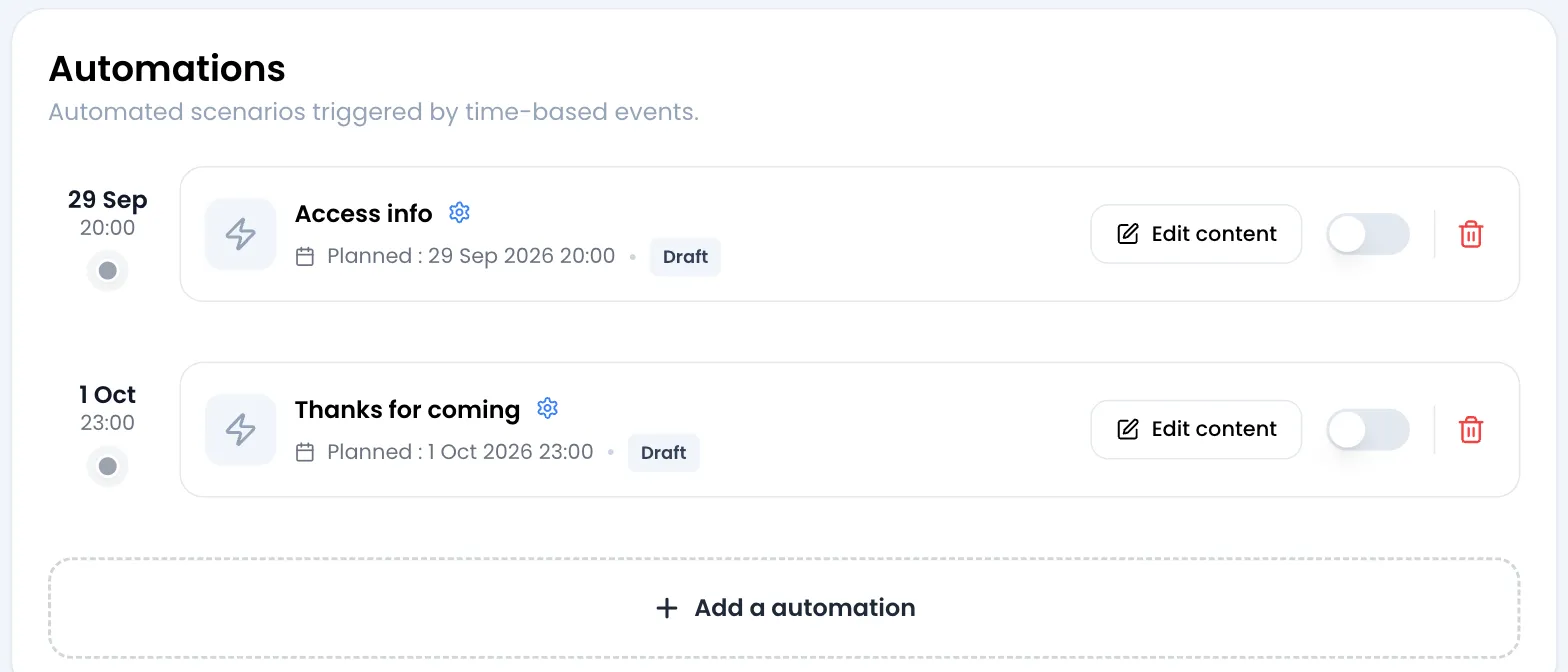
After that, automations are listed from the nearest to the furthest, each preceded by its date on a timeline. The Add a automation button is below the list.
Create an automation
Section titled “Create an automation”-
Click Add a automation, or one of the shortcuts.
-
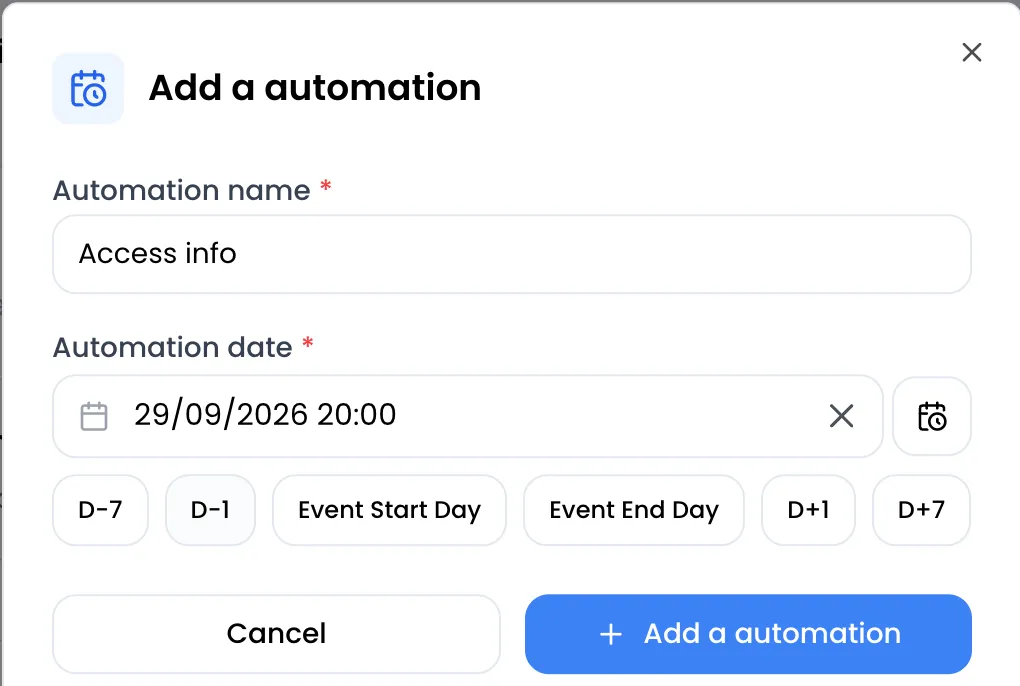
Enter the Automation name, for example “Access info”. Your attendees do not see it.
-
Choose the Automation date: the day and time of sending. The button with a calendar icon, to the right of the field, shows quick-date buttons under the field (click it again to hide them): D-7, D-1 and Event Start Day are calculated from the start of the event, Event End Day, D+1 and D+7 from its end, at the same time.
-
Click Add a automation. The message Automation added successfully! appears. The automation is created as a Draft.
The date must be in the future, otherwise the message You cannot schedule an automation in the past. appears.
Choose the content type
Section titled “Choose the content type”Click Edit content on the automation card. The Choose Content Type window offers four options:
- Standard Email: a classic email, with your content.
- Standard SMS: a short SMS.
- Email Feedback: an email inviting people to give feedback on the event.
- SMS Feedback: an SMS inviting people to give feedback.
An automation sends only one type of message. To send an email and an SMS at the same time, create two automations. Saving content of another type replaces the previous content.
Choose the recipients
Section titled “Choose the recipients”The top of the form, the same for all four types, defines who receives the message.
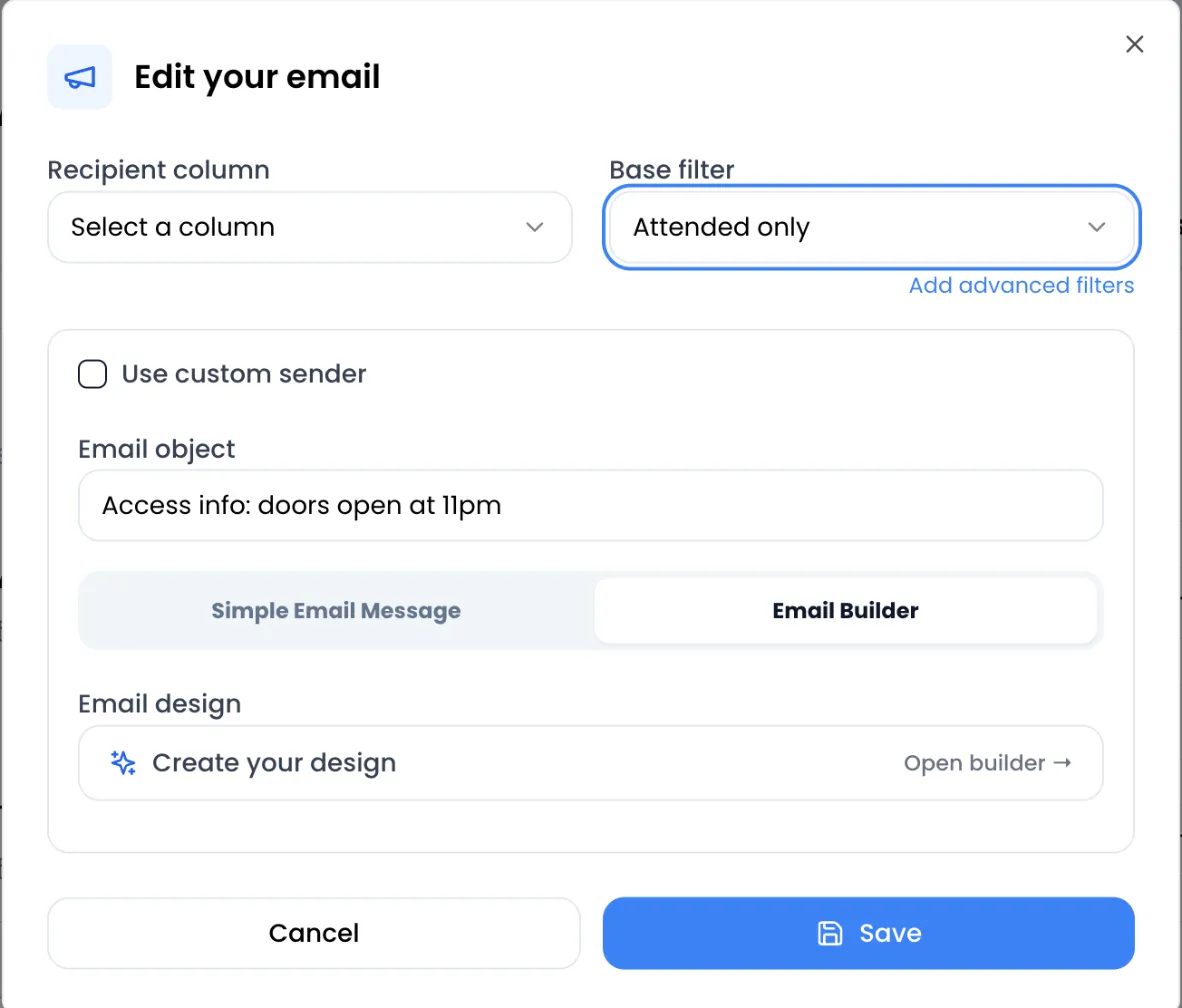
- Recipient column: the information that holds the address or number. For an event with ticketing, the list offers Email, First name, Last name, then your custom fields. Choose Email for an email, and the field holding the phone number for an SMS.
- Base filter: All participants, Attended only (those whose attendance was recorded, see Track attendance) or Not attended.
- Add advanced filters: adds a condition on a custom field, for example “Package” equals “VIP”. Choose the field, then the value: a list for a choice field, Yes / No for a yes/no field, a free field otherwise. Add filter adds another one; the cross removes one. An attendee must meet every filter, with an exactly equal value.
Write an email
Section titled “Write an email”-
Sender. If your account has a sending domain, tick Use custom sender, then enter the Sender email and the Sender name. Otherwise, the email leaves from a Sweescape address, under the Sweescape name.
-
Enter the Email object (the subject line), between 10 and 150 characters. You can type variables in it (see Personalize with variables).
-
Choose the writing mode:
- Simple Email Message: a text editor with heading, bold, italic, strikethrough and list. The Variables button inserts an attendee’s information. The magic wand opens a Describe to SweeAgent what you want to write field: the AI writes the message for you (see AI in Sweescape). The message must be at least 20 characters long.
- Email Builder: click Create your design to build the email with blocks (see Design an email with the editor), then Close builder.
-
Click Save. The message Automation content updated successfully! appears.
Write an SMS
Section titled “Write an SMS”For a Standard SMS, type the Sms message, then click Save.
- The message must fit in a single SMS: 160 characters, or 70 as soon as it contains a special character (emoji, lower-case
ç). The counter shows the space available; once the limit is reached, you cannot type any more and the message Limit reached: this message is sent as a single SMS, it cannot be longer. appears. - Variables are not accepted: the SMS is sent as is to every recipient.
- Each recipient costs one SMS credit, debited when the message is sent.
Ask for feedback after the event
Section titled “Ask for feedback after the event”The Email Feedback and SMS Feedback types send a link to a satisfaction questionnaire that Sweescape creates for the event when you save. Each attendee receives a personal link.
- Email Feedback: choose Email Builder mode. Its template already contains a Give my feedback button linked to the questionnaire. If you design your own email, keep the Feedback form link variable in a button’s link.
- SMS Feedback: write a short message; the questionnaire link is added automatically at the end, and the counter takes its length into account.
Answers are available in SweeAnalytics (see Attendee feedback).
Activate the automation
Section titled “Activate the automation”An automation only goes out if it is activated.
-
Save its content first. Otherwise, activation shows Automation content is missing.
-
Toggle the switch on the right of the card. The message Automation is activated! appears and the badge switches to Activated.
-
On the planned date, the message goes to the attendees who meet the filters at that moment. The badge switches to Completed.
To pause an automation, toggle the switch back: Automation is deactivated! appears and it returns to Draft. An automation that is deactivated on its date does not go out.
Read the timeline and statuses
Section titled “Read the timeline and statuses”To the left of each card, the timeline shows the day and time of sending above a coloured dot. The card also shows the date after Planned :.
| Dot | Badge | Meaning |
|---|---|---|
| Grey | Draft | The automation is not activated. |
| Blue, blinking | Activated | It will go out on the planned date. |
| Green | Completed | The message has gone out. |
| Red | Error | Sending failed, for example because there were not enough SMS credits. |
Edit or delete an automation
Section titled “Edit or delete an automation”- Name and date: click the gear next to the name. The Edit window, followed by the name, offers the same fields as at creation; click Save. A past date is refused with Cannot schedule an automation in the past!, and an automation that has already gone out with Cannot update a completed automation!.
- Content: Edit content button. It disappears once the message has gone out.
- Delete: the bin on the right of the card, after confirmation.
Good to know
Section titled “Good to know”- Recipients are chosen at send time. An attendee added before the send time receives the message; an attendee added after does not.
- One message per attendee. Someone who bought three tickets appears three times among the attendees and receives the message three times.
- Unsubscribes do not apply. An automation is a message about the event: it also goes to people who unsubscribed from your campaigns, and it has no unsubscribe link. Keep it for information that is useful to attendees.
- SMS credits: all or nothing. At send time, one credit is debited per selected attendee, even if their phone column is empty. If the balance is not enough, nothing is sent and the automation switches to Error. Check your balance in the SMS Credits menu before the date.
- No test send. Check your email with the form’s Preview before activating the automation.