
Create and manage your audiences
An audience is a contact list that belongs to your account, not to an event. It is what you pick as the recipients of an email or SMS campaign. Each audience is a table: one row per contact, one column per piece of information (email, first name, phone, city…).
Two ways to fill an audience
Section titled “Two ways to fill an audience”- From a file in CSV, XLSX or XLS format: your contact base, an export from another tool. The audience is labelled Manual Import.
- From a finished event: the event’s attendees are copied into a new audience. It is labelled Past Event.
Audiences are part of the paid plans. Without an active subscription, the create button opens a window inviting you to pick a plan (see Subscription).
Open your audiences
Section titled “Open your audiences”Open your account menu at the top right, then Audience. The page shows one card per audience, newest first. Each card shows the name, the type (Manual Import or Past Event), the number of contacts and the creation date.
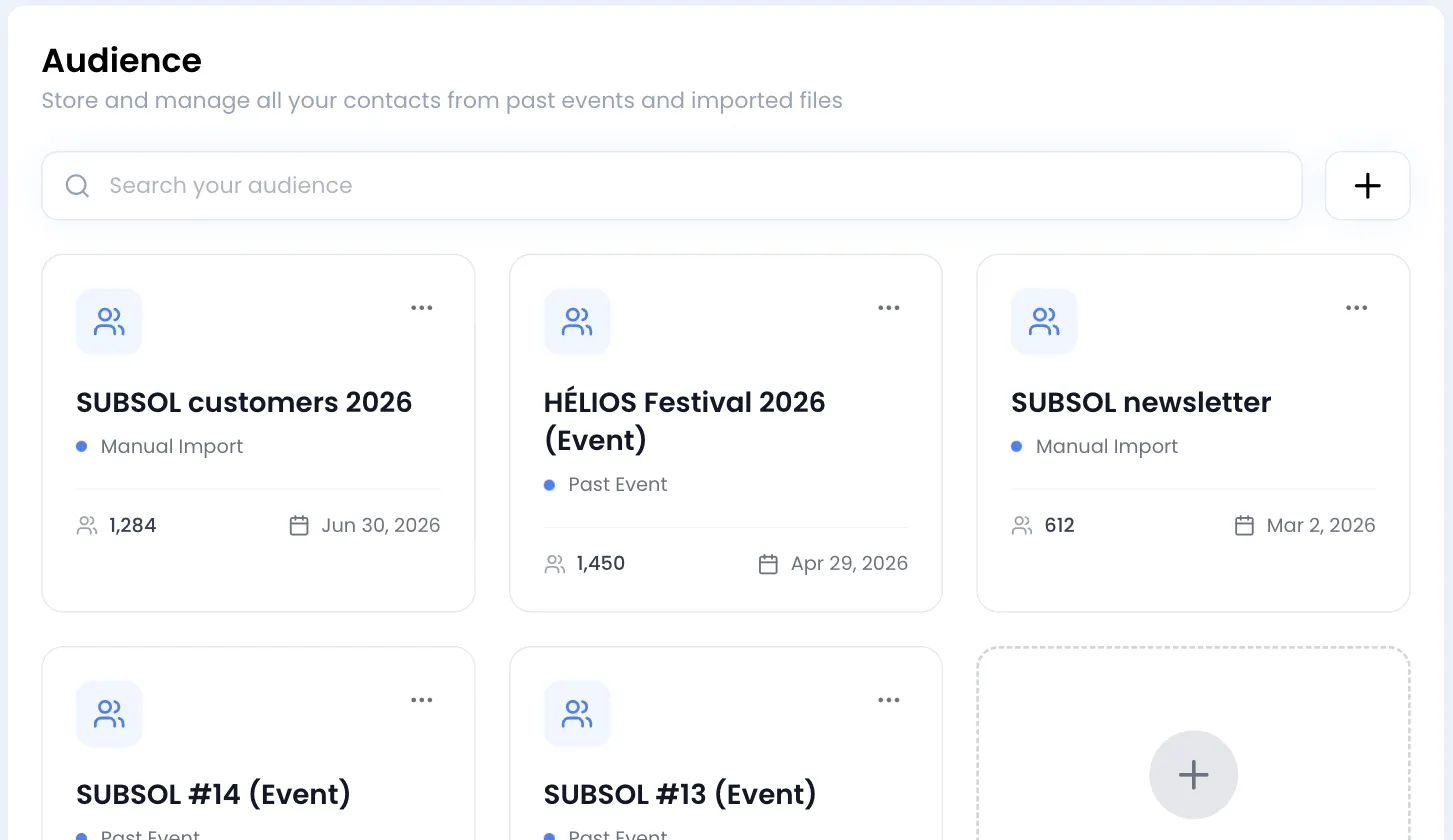
The Search your audience field filters the cards by name. Click a card to open the audience, its contacts and its segments (see Audience contacts and segments).
Create an audience from a file
Section titled “Create an audience from a file”-
Click the + button next to the search field, or the Create a new audience card.
-
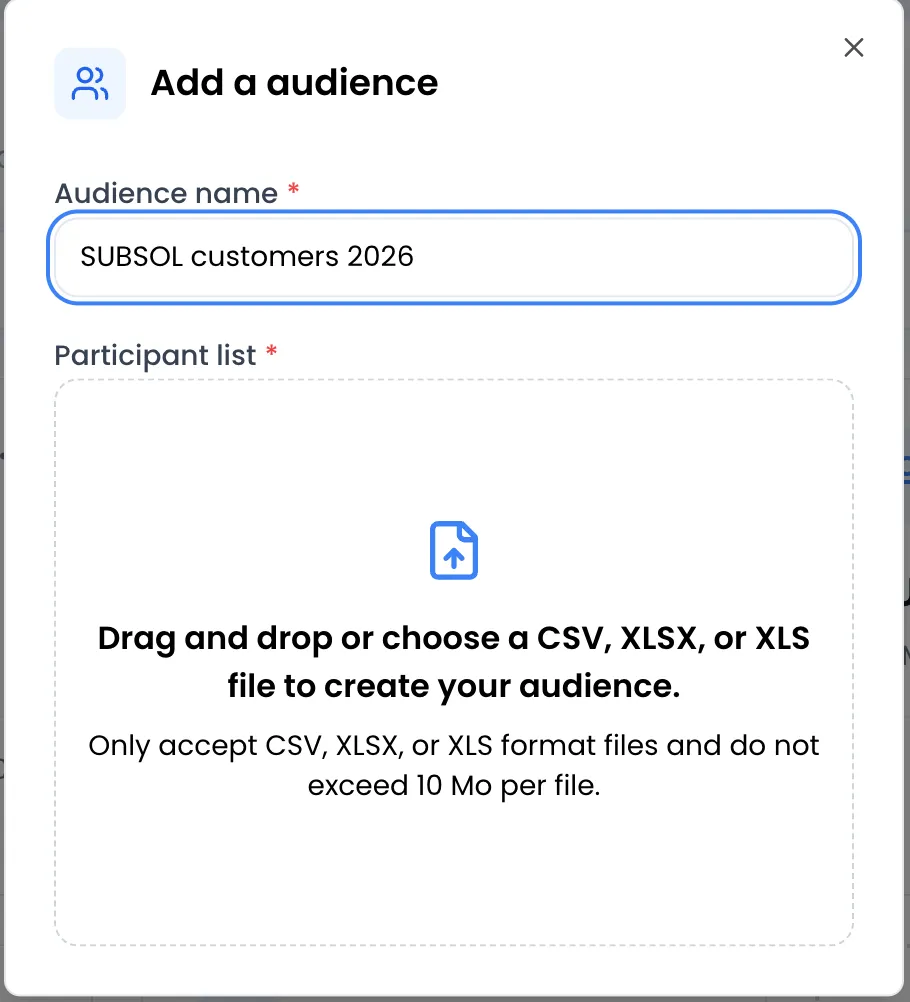
In the Add a audience window, enter the Audience name (at least 2 characters), for example “SUBSOL customers 2026”.
-
Drop your file into the Participant list area, or click it to pick the file. Until the name is filled in, the area shows Please enter an audience name before inserting a file.
-
The audience is created as soon as the file is dropped: there is no confirm button. The message Audience created successfully! appears and Sweescape opens the Settings tab of the new audience.
-
Check the email and phone columns, as explained in the next section.
To prepare the file:
- The first row holds the column names, each following row is a contact.
- Accepted formats: CSV, XLSX or XLS, 10 MB maximum.
- Column names become the personalization variables of your campaigns. Prefer short, unambiguous names:
firstname,email,phone. - Write foreign phone numbers with their country code (
+34 612 345 678). A number without a country code is treated as a French number. - Two rows with the same email address create a single contact. Rows without a valid email address are merged only if they are strictly identical.
Possible error messages:
| Message | Cause |
|---|---|
| File is too large, please retry with a smaller file! | The file is over 10 MB. Split it: the first file creates the audience, the next ones are imported into the existing audience. |
| Invalid file extension, please retry with a csv, xlsx, or xls file! | The file is neither a CSV nor an Excel file. |
| Invalid data, please retry with a valid data! | The file has no contact row below the column names. |
Choose the email and phone columns
Section titled “Choose the email and phone columns”Two settings tell Sweescape where to find each contact’s address and number. They are in the audience’s Settings tab, General information card.
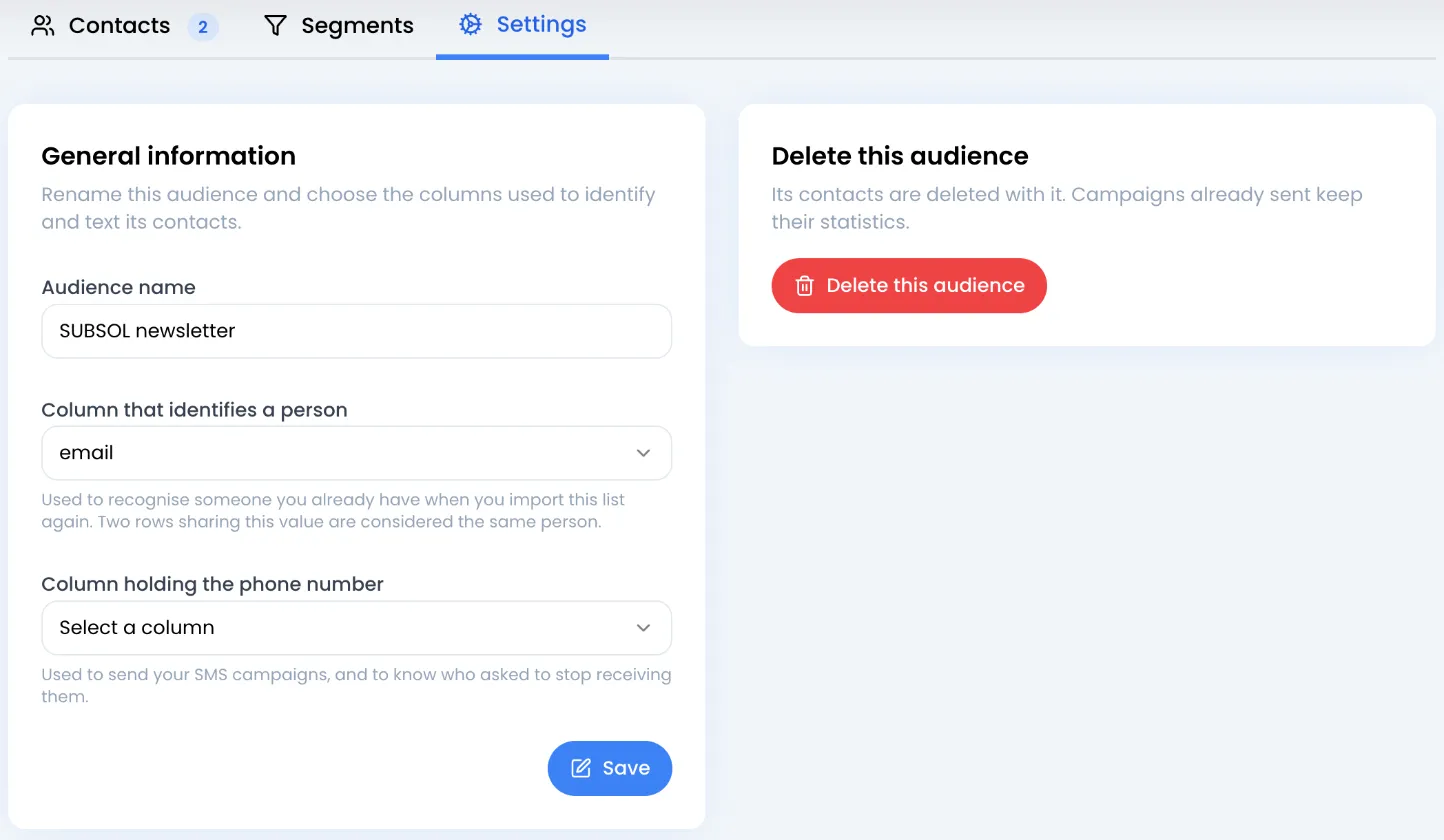
- Column that identifies a person: the column holding the email address. Sweescape picks it when the audience is created: it is the column with the most values that look like an email address. It is used to send email campaigns, to recognise a contact you already have when you import again, and to apply unsubscribes.
- Column holding the phone number: it is never guessed, choose it yourself. It is required for SMS campaigns and to apply requests to stop SMS.
Click Save. As long as one of the two columns is not set, a banner at the top of the audience page reminds you.
Create an audience from a finished event
Section titled “Create an audience from a finished event”-
Open the event, then the Settings tab.
-
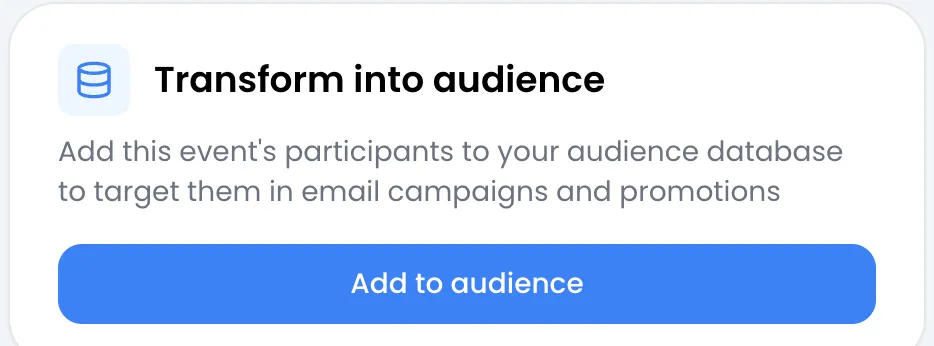
Find the Transform into audience card. It only appears once the event’s end date has passed.
-
Click Add to audience. The message Audience created successfully! appears.
The new audience is named “event name (Event)” and appears on the Audience page. Its columns are the attendees’ information: for an event with ticketing, the first name, last name and email (columns firstname, lastname and email), plus your custom fields. The email column is recognised automatically. If you asked for a phone number in a custom field, declare that column in the audience’s Settings tab.
The same email address can appear several times if it goes with different names: a parent who bought tickets for their children stays as several contacts. Rows with the same address and the same name are copied only once.
Special cases:
- Audience already exists for this event!: an event gives only one audience. Use the existing one.
- An event without any attendee cannot be turned into an audience: an error message appears.
- The copy is never updated. To add contacts later, import a file into the audience (see Import a file into an audience).
Rename or delete an audience
Section titled “Rename or delete an audience”The ⋯ button on a card offers three actions:
- Audience settings: opens the audience page.
- Import a file: adds contacts to the audience (see Audience contacts and segments).
- Delete this audience.
To rename an audience, open it, then the Settings tab: change the Audience name and click Save. The Delete this audience card in the same tab also deletes it.